" "

workflow

From Daunting to Done: Completing a Dissertation with Personal Kanban

I have never completed anything to date that was more complex, daunting, or onerous than completing my dissertation. From the first day of my doctoral program, I knew that the only way I could complete this monumental task was to break it down into small, manageable pieces of work, and then visualize and track that work over nearly three years.

I was familiar with LeanKit when I started my program as I had used it personally and professionally to manage my life thanks to PersonalKanban. Isn’t it funny that once you buy into a system, everything you see is in context of the system? Just thinking about my dissertation plan triggered a visualization in my brain of cards on a kanban board.

The first thing that any academic will tell you about this process is that it consumes your life. You may not be actively doing research or have your hands on the keyboard, but you are thinking about it constantly. The reason why I am telling you something that seems obvious is because it’s critical to illustrate how I constructed my board to manage the process.

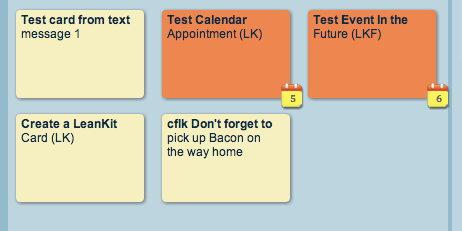
Let’s talk about my board—it manages my life and has evolved over time. I have work related tasks and personal tasks in separate Ready/Today columns, and then a Doing column that shows my WIP. I have a WIP limit of 5. I have a Stuck/Critical column, a Waiting For column, and then the typical Done columns.

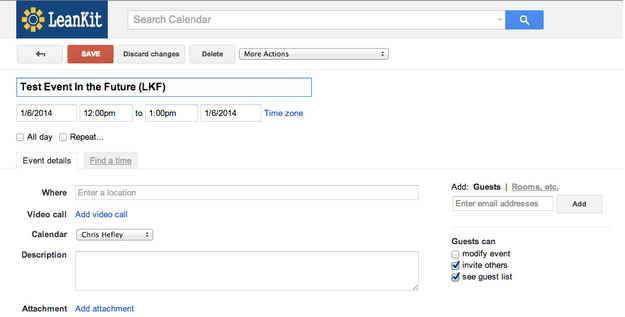
Branden's LeanKit Kanban Board

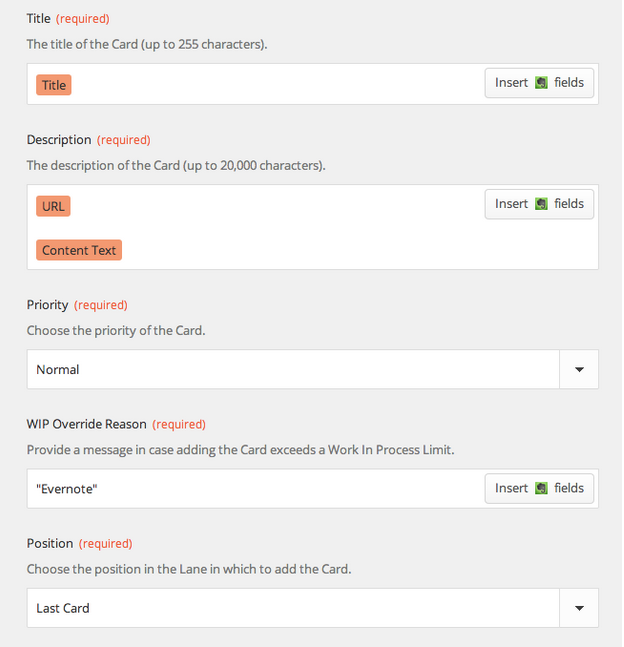
When I thought about breaking down my dissertation into manageable chunks, I used LeanKit’s Task feature. I had one card called Dissertation that stayed in my Doing column, meaning that my WIP limit for the last few years was actually 4 (not 5) as my ever-present dissertation consumed one of those spots. Then I built a task board with Ready, Doing (WIP limit of 3), and Done lanes that contained all of the subtasks. There were a total of 22 major work products that needed to be managed. The actual number of tasks associated with my dissertation was significantly higher than that, but these were the major projects that needed multi day/week management.

Breakdown of Dissertation Tasks in LeanKit

My dissertation followed the standard 5 chapter model (Intro, Lit Review, Methodology, Results, Discussion), with the second chapter was treated like a collection of 12 essays of 3-10 pages each in length. Then there are processes like Scientific Merit Review and the Internal Review Board that represented multi-week processes that had to be managed. I hired an editor to review my early work to make sure I was on progress. After committee review, you have to defend your dissertation which requires an oral presentation and Q/A by your committee. See what I mean by daunting?

Each of these items had a card that I moved from the task board’s Ready column, to Doing, to Done. After my last task card (return from Format/Editing and Publication Submission) was done, I moved the parent card from Doing to Done. You can’t imagine a more satisfying feeling than moving a card that you’ve been staring at for almost three years out of the WIP area of your board.LeanKit helped me keep my life sane throughout this long academic journey, and it can be used to help you as well. I would often build cards for projects, papers, or other deliverables too to make sure I was always on top of my time. Using LeanKit as a task management system can help you translate task management skills into your post-academic careers as well by bringing Lean techniques to your professional career.

Text a Task Card to Your Kanban in LeanKit using Twilio and Zapier

Today, I’ll show you how to set up your LeanKit/Zapier integration with Twilio, so that you can create a new LeanKit card by sending an SMS (Text) Message from your phone.

Create a Twilio Account

Verify Your Account

Twilio Generated New Phone Number

Create a New Zap

Configure Your Twilio Account, SID and Auth Token

Accounts Setup Correctly

Select Twilio Number for SMS

Selecting LeanKit Board, Lane and Card Type

Other Required LeanKit Fields

Testing and Naming the Zap

Sending a Text to Twilio to Create a New LeanKit card

First, you’ll need an account with Twilio, a popular programmable voice and SMS Service. Go to Twilio.com, and sign up for a new, free account.After you create your account, you’ll be asked for your phone number, and Twilio will send you a text message with a confirmation code, which you’ll need to enter on the next screen:Twilio will then generate a new phone number for your account:Now, open up Zapier.com, and log into your account, and create a new Zap, as shown below:Zapier will ask you to configure your Twilio account, using your Account SID and Auth Token from Twilio, shown below:Once you have set up your Twilio and LeanKit accounts correctly, you’ll see this:Select your Twilio number that you’ll send SMS messages to…And select the LeanKit board, lane, and card type. In the LeanKit “Title” (card title) field, choose “Body” from the list of available Twilio fields.Fill in the other required LeanKit fields:And finally, test and name your new Zap.You should now be able to text message your Twilio number (I created a contact in my iPhone for “LeanKit Twilio”, and a new LeanKit card will be created: This is the fifth post in the series by Chris Hefley of LeanKit showing how to integrate tools many of us use everyday with our Personal Kanban. You can read the previous post – Integrating Your Personal Kanban with Campfire in LeanKit using Zapier here.

Integrating Your Personal Kanban with Campfire in LeanKit using Zapier

Does your team use Campfire? Ever wish you could just create a LeanKit card from the Campfire chat window, just by typing in a simple command?   This integration between Campfire and LeanKit, via Zapier.com, will let you do just that.

Create a New Zap using Campfire and LeanKit

Add your Campfire API token

Configuring the Campfire Trigger

Filter Campfire Trigger

Typing the Message in Campfire

Setting Up the LeanKit Side of Integration

Title, Description and Other Required LeanKit Fields

Testing the Integration

Running Your Zap Manually from the Dashboard

LeanKit Card on Your Personal Kanban Board

In your Zapier account, create a new Zap, using the Campfire “New Message” trigger and the LeanKit “New-Add Card” action.Zapier will prompt you to set up your Campfire account, and ask for your Campfire API token:Once you have your Campfire and LeanKit accounts set up correctly...…you’ll be able to configure your campfire trigger. I chose to set it so that if I type cflk  (for “CampFire LeanKit) at the beginning of a message in Campfire, that will be the signal to create a LeanKit card from that message.Now I’ll go into my campfire room and type a message:And then set up the LeanKit side of my integration to point to my personal kanban board, target lane, and card type:I’ll set the Title, Description, and other required LeanKit fields:And then test the integration:I did have a little trouble at this step. If you’re using an existing campfire room and one of the first 3 messages doesn’t match your filter, Zapier isn’t pulling up a trigger sample that matches the filter for you to test with. In that case, I saved my Zap anyway, and then ran it manually from the Dashboard:And Viola! I have a LeanKit card reminding me to buy bacon. As if I would ever forget something that important. :)This is the fourth post in the series by Chris Hefley of LeanKit showing how to integrate tools many of us use everyday with our Personal Kanban. You can read the previous post – Personal Kanban: Integrating Evernote with LeanKit using Zapier here.

Personal Kanban: Integrating Evernote with LeanKit using Zapier

Continuing our series of Personal Kanban focused integrations for LeanKit, let’s take a look at integrating Evernote with LeanKit. Say you’re in Evernote, and you want to quickly add a card to your personal kanban board in LeanKit.  With this integration, you can simply add “(LK)” to the note title, and BAM! LeanKit card.

Creating a new Zap trigger from Evernote

Authorizing Your Evernote Account

Set up LeanKit Evernote Accounts

Configuring LeanKit Fields Evernote Title and LeanKit Card Title

Adding Evernote URL field to LeanKit description field

Creating a New Note in Evernote

Test and Naming the Zap

New LeanKit card

URL to the original note included in leanKit card

As in our other integrations, we’re going to use Zapier.com to connect Evernote and LeanKit.Create a new “Zap” using the “New Note” trigger from Evernote with the “New -Add Card” action from LeanKit.Zapier will prompt you to authorize your Evernote account:After setting up your LeanKit and Evernote accounts,You can now configure the trigger for evernote. I chose to add a filter on the note title. In any notebook, I can add “(LK)” to the note title and have a LeanKit card created for that note. I could have chosen other options here, and you may decide you’d like it to work differently. For exaple, you could create a separate notebook in Evernote, and just have all notes from that notebook get added to LeanKit as cards. Or you could use the “tags” in evernote instead of the title, like I did.Now configure the LeanKit fields, including the Evernote Title in the LeanKit Card Title field.I also added the Evernote “URL” field to the LeanKit Description field, to provide me with a link back to the original note.So, to test this, create a new note in Evernote, with “(LK)” in the note Title:Then test and name the Zap you’ve created:And you should get a new LeanKit card, as shown below:You can also see the URL to the original note included in the description of the LeanKit card:Enjoy!This is the third post in the series by Chris Hefley of LeanKit showing how to integrate tools many of us use everyday with our Personal Kanban. You can read the previous post - Personal Kanban using Google Calendar, LeanKit and Zapier here

Personal Kanban using Google Calendar, LeanKit and Zapier

This is the second post in the series by Chris Hefley of LeanKit showing how to integrate tools many of us use everyday with our Personal Kanban. You can read the first post - Killing Email Interruptions: Personal Kanban using LeanKit, Gmail and Zapier here.

This time, we’ll look at how to integrate Google Calendar with LeanKit via Zapier.com. We’ll look at two different ways to use Google Calendar and LeanKit together.

Creating a Zap Trigger

Setting up GCal with LeanKit

Search Term for GCal Trigger

Creating a new card type in LeanKit

Matching GCal event to LeanKit

Adding Summary and Event Fields to LeanKIt Description Field

Creating an Event with LeanKit in the Event Title

Testing Zap

New LeanKit card on Personal Kanban board

Alternative way to add event cards to your board - Event Start Trigger

Setting up new trigger parameters

New Calendar Event Setup

Testing and naming the new Zap

New Event Card on the LeanKit board

First, let’s create a “Zap” based on the Google Calendar “New Event Search” trigger. This will allow to create a Google Calendar event and a corresponding LeanKit card at the same time.Zapier will prompt you to set up your Google Calendar account and you can use your already set-up LeanKit account.After setting up the accounts, set the Search Term for the Google Calendar trigger. I used “(LK)”. If I create an event with “(LK)” in the title, this integration will create a LeanKit card for that event. That way, I can easily control which events from my calendar get a card.Now, I want to create a new card type on my LeanKit board, for “Event”.Now that we’ve taken care of that, we can set up the target LeanKit board, lane, and card type.Use the “Summary” field from the list of fields available from Google Calendar for the LeanKit Card Title field.Not all my calendar appointments actually have a description. Since Description is a required field in the LeanKit integration, add the “Summary” and “Event Begins (Pretty)” fields to the LeanKit Description field, in addition to the Google Calendar Description field, as shown below:We’re nearly ready to test the integration. First, though, let’s go to Google Calendar and create an event with “(LK)” in the event title:Finally, test and name the Zap:And you should get a new LeanKit “Event” card on your personal kanban board:There’s one other way I’d like to integrate my Google Calendar with LeanKit. I’d like to create a new card on my LeanKit board one day before a scheduled event, instead of immediately when I first create the event. So, if I’m using my personal kanban board to keep track of things I have to do on a given day, I will get the next day’s events added the the board each day.For this integration, I’m going to use the “Event Start” trigger from Google Calendar.When setting up the trigger parameters, I chose 1 day, and used the Search Term “(LKF)” (for “LeanKit Future”). The Search Term is optional, if you want this trigger to fire for all events.For the LeanKit parameters, set them up the same as in the previous example, then create a new Google Calendar event. The event needs to be in the future, within 24 hours of the current time in order for our test to work. And I’ve added “(LKF”) to the event title:Test and name this Zap:...and we should now have a new Event card on our LeanKit board:There you go! Now you can create a card and event at the same time, or mark a calendar event to have a LeanKit card created in the future, when the event is 1 day away.

" "